Thursday, December 30, 2010

Fridge Magnet Art

I have a thing for magnets and ephemera. I love random post cards, stickers I can't bear to stick to anything and cutouts from magazine ads. For awhile I used my refrigerator as my collage canvas. It was OK but a little messy.


When I moved about a year ago I acquired a new stainless steel fridge. Most of my magnets did not stick. Crap! The Beavis seemed somewhat pleased that I could no longer have my crazy, random fridge "art" on display any more. He's a bit of a neatnik. 

So, I came up with this:
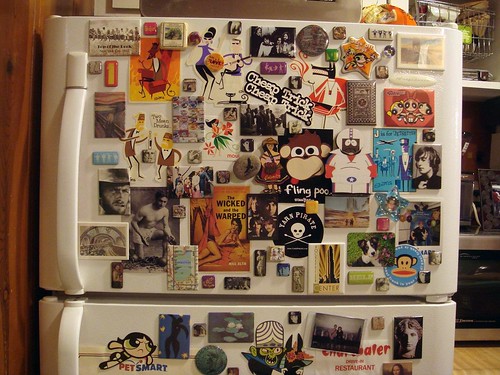
Pardon my craptastic photography. The lighting in my kitchen is dark and weird and I'm too lazy to set up the proper lighting.
This piece hangs over my kitchen peninsula and I can change out the artwork whenever I want plus The Beavis likes that my collage is contained and not in the way of him wiping down the refrigerator doors. 

I bought a canvas from the art store and a quart of magnetic paint from the home improvement store. Seriously. That is all you need. Ok, maybe a brush or paint roller and a frame if you want. 

If you don't plan on framing your magnetic art canvas, spend a few extra bucks and get a canvas with a "gallery wrap". This means that the canvas is wrapped around the sides and stapled in the back. You can save some $ by getting a canvas with the staples on the side but no amount of paint can hide those staples. You could also use a canvas board or even just a piece of wood for this project.

I decided to leave the canvas the color of the paint but if you want to get all matchy, matchy you can apply some latex paint over the magnetic paint.

A word to the wise... magnetic paint stinks!!! Do your painting outside and wear breathing gear. Also, it takes many coats of the magnetic paint to lay down the metal particles that your magnets will be attracted to. I ended up putting 10 thin coats on my canvas. After several coats use your heaviest magnet to test the "stickiness". 

One more tip, use a heavy duty hanger when you put your magnet art on the wall. The paint plus your cute little magnets can be rather heavy. I found these awesome hooks at Lowe's that don't damage sheetrock and hold up to 50 lbs.

Wednesday, December 22, 2010

Button Wreath Tutorial

Look ma! I'm on TV!

Check out Shawn, me and Sarah from Sew Crafty on Great Day Houston with some Christmas craft tutorials. You might recognize the button-adorned frames. 

http://www.khou.com/great-day/gdh_122010_seg3-112183544.html

Wednesday, December 1, 2010

Family Intro - Part 1

Meet Bruce.  He is my 4 yr. old Australian Shepherd that I've had since he was 7 weeks old.


This 70 lb. baby isn't always the best behaved or the most calm dog but I love him dearly.


He is extremely smart. Bruce sits, shakes hands, does a mean high-five, models my knitted projects and will fetch a tennis ball from under a chair or from the middle of a lake.

Monday, November 29, 2010

Brucey Stardust

Another reason why I love Photoshop: Even my dog can take it all too far, but boy can he play guitar.

Friday, November 26, 2010

It will take me a long time to decorate my walls

The last place I lived in was barely 1200 square feet (I know that to someone in New York that sounds ginormous but where I live it is near minuscule). It was a duplex that was built in 1927. My favorite part of that house was the lovely arch that separated the living room and the dining room/office.

There were no hallways. Each room had at least two doors so you would just move from room to room to room. All of the walls had a window or doorway so art space was at a premium. It was a little small for 2 people, 2 cats and a large dog but we loved it.  I also loved that I had it decorated just the way I wanted it after 9 years.

Last year my husband and I were able to buy our own place. I'm quite lucky and live in a fantastic downtown loft-like townhouse. I have some things that I always wanted like a lot of counter space, an attached garage, a dishwasher and a closet that I can walk into.

My empty living room walls
Another thing that I have that I never thought I would have trouble with is a huge amount of wall space. My living room alone has a 17' ceiling.

See that large photo of the Empire State Building in the first photo that almost took up an entire wall? It now looks like a postage stamp in my new place.

After years of decorating with tiny wall spaces I can't quite get out of the habit.

This is my latest little collection that sits at the bottom of the second floor staircase. I love collections of random photos and doodads.

The Beavis commented on my latest decorating attempt. He said, "...the pictures look nice but can we please start hanging up things that are larger than 5" x 7"?"

Sunday, November 21, 2010

Printable Iron-on paper

Another one of my favorite crafts is making custom t-shirts with my own designs. I'm not a famous graphic designer, yet, but I can pretend that I am when I wear a t-shirt with my own artwork on it.

The Beavis wearing one of my designs
If you haven't tried iron-on paper yet, I highly suggest it. Be sure to get the type of paper for the color of shirt you are going to apply it to. I like using the paper for dark shirts because I can create a white border around my images.

The print isn't as nice as a silk-screened design and will fade with washing but I like the faded effect.

Wednesday, November 17, 2010

The Banana Bread Disaster

Don't you judge me!
What on Earth did I do to this banana bread? I followed the recipe from Kraftrecipes.com to the letter. I ended up with this weird, half-baked, slimy concoction. It smelled like banana bread and tasted like banana bread, but brother, it was not banana bread.

If you have a good, easy banana bread recipe that a non-cooker like me can handle, please send it my way.

Also, if you have any idea of what I did wrong to this Franken-bread, let me know.

Monday, November 15, 2010

Quickie Cute Gifts

I absolutely love adding buttons to things. I have a pretty decent collection of buttons that partly comes from my grandma's stash and partly from my constant trips to craft and fabric stores.  My mom still has a couple of large tubs with thousands of buttons that I plan on kidnapping in the future (Mom, if you are reading this imagine me waving my hands in front of you in a disorienting manner. You didn't see anything!)

If you are lucky enough to have a button stash and need some quickie gifts I have the craft for you.  If you don't have a button stash you can pick up a small assorted bag of the lovelies from most craft stores.

Grab up some cheap frames or photo albums from the local discount shop (I raided Target but IKEA also has a nice selection of frames) and get to gluing some of those buttons on them. For the two items above I used hot glue but if you've been banned from using a hot glue gun then an all-purpose glue like E-6000 would work just as well.

Very cute. Very quick. Pretty cheap. 

If you are wondering why I mentioned being banned from using a hot glue gun it is because I may someday be banned from using one in my home. The Beavis (dear husband) banned me from candle making years ago after a rather unfortunate wax incident. I'll save the details for another post but let's just say that a large pot of vanilla scented wax caused The Beavis to spend an afternoon under the kitchen sink performing plumbing surgery. I've managed to keep from being banned from using my heat gun but I came pretty close to the edge when my old cat was covered in glitter and embossing powder.

Watch out for those heated craft tools my friends!

Saturday, November 13, 2010

Artistic Puppy

I love Illustrator and Photoshop! My favorite thing to do on my laptop is to take a photo like this:

Don't believe her, she looks innocent but she is crazy like a squirrel

 and turn it into something like this:


I'm currently working on a painted version of this image which will soon be hanging in my entryway.

Friday, November 12, 2010

Don't Drink the Kool-Aid

I've heard of dying yarn with Kool-Aid but had never given it a second thought. I've dyed yarn before with acid based dyes that I get at my local art supply store. I have to admit, dying with Kool-Aid was much easier and smelled much better. You don't have to use vinegar to set the dye which is nice so the kitchen smelled like lime and strawberries and oranges.

I read on-line that Kool-Aid does a better job on animal based-fibers. I haven't tried this technique with plant-based fibers but if my cotton t-shirt proves anything, Kool-Aid will dye the crap out of whatever you have.

Pictured above: The gloves I should have been wearing
I found some great info on the dyeing process here. Scroll down to the bottom of the page to see color samples of what the different flavors will produce. You'll be surprised at some of the results.

Take my advice and please use your gloves. I wasn't wearing mine when I mixed the powder with some water and ended up with bright red, green and blue spots on my skin.

Check out what I made with my Kool-Aid yarn:

The Entangled Stitches pattern I converted to fingerless mitts
For this color combo I used 6 packets of Lemon Lime, set the dye and then dumped the yarn into a bowl with 6 packets of Ice Blue Raspberry Lemonade to fill in the white spots. If you want really bright patches of color you can apply the powder directly to wet yarn.

Wednesday, July 7, 2010

Nubby Bath Mitt


Behold! The mighty bath mitt!

OK, perhaps the bath mitt isn't so mighty but it sure is handy.

I wrote up this knitting pattern for a class I'm teaching to newbie knitters. If you can cast on, knit, purl and bind off, you can make this bath mitt which would also work as a dish cloth or car washing scrubby.

Astound and impress your friends by giving gifts of fancy bath stuff accompanied by hand-knitted goodies.

download the pattern

Tuesday, July 6, 2010

Crafty Tool Belt

I got crafty with a pair of old jeans and some ribbon. Check out my post on the Sew Crafty Houston blog for all of the gory details.

Thursday, May 6, 2010

Hi!

I keep thinking of hilarious stories to tell so let's give this blogging thing a whirl, again.