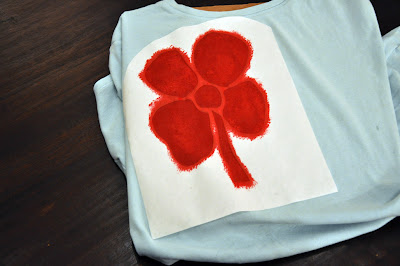
Usually the stains come out in the wash but every now and then I'm stuck with them. So, I decided to make some lemonade out of lemons and save a t-shirt.
Ta da!!! The stain has magically disappeared!
I used a freezer paper stencil to add this groovy flower to my shirt. To create your own custom shirt you'll need:
- a shirt, duh!
- freezer paper (make sure it is freezer paper, don't use wax paper!)
- fabric paint and a sponge or brush to apply it with
- a piece of cardboard large enough to fit inside your shirt
- craft knife and cutting board
- an iron and ironing board
 |
| My greasy shirt |
I sized my design to fit on a standard piece of 8.5"x11" paper and then cut out a piece of freezer paper to those dimensions.
You'll need to either print your design or trace/draw it on the freezer paper. (TIP! If you are going to use a printer make sure to feed the freezer paper so that printing is on the paper side. Run a test with a piece of regular paper and mark a corner on it to make sure which way the freezer paper needs to be placed in the printer tray.)
Once you have your design on the freezer paper you'll need to cut out the parts of the stencil that expose the parts of the shirt you want painted. Take your time cutting out the stencil and use a cutting board or thick piece of cardboard for a cutting surface. You want clean lines.
Place the stencil on the shirt right where you want your design with the waxy side down and adhere it to the shirt with a warm iron (no steam!). Run the iron over the stencil until it is completely stuck to the shirt.
To prevent the fabric paint from seeping to the other side of your shirt, place a piece of cardboard inside it to act as a barrier. Now apply the fabric paint with a small sponge or stiff bristle brush. I prefer to do several light coats of paint so that I don't get any accidental drips. I also apply the paint with light up and down dabs. If you swipe your brush back and forth you might get some of the bristles underneath the stencil.
Once the paint has dried, peel off the freezer paper. Follow the paint manufacturer's instructions for heat setting the paint. The brand I used just needed a final ironing to set the paint.
Ta da! Instant stain removal!


No comments:
Post a Comment