Wednesday, September 14, 2011

I don't need OxiClean, I have paint and freezer paper!

It doesn't matter what I'm wearing, I always manage to spill something on myself. In fact, I have a salsa stain from today's lunch on my shirt right now.

Usually the stains come out in the wash but every now and then I'm stuck with them. So, I decided to make some lemonade out of lemons and save a t-shirt.


Ta da!!! The stain has magically disappeared!

I used a freezer paper stencil to add this groovy flower to my shirt. To create your own custom shirt you'll need:

 - a shirt, duh!
 - freezer paper (make sure it is freezer paper, don't use wax paper!)
 - fabric paint and a sponge or brush to apply it with
 - a piece of cardboard large enough to fit inside your shirt
 - craft knife and cutting board 
 - an iron and ironing board

My greasy shirt
I started off with a flower drawing that I did in Adobe Illustrator. Don't worry if you are not a designer. Any clip art, drawing or text will do just fine. Just make sure that your design is simple enough to cut out with a craft knife. I've seen some awesome, detailed freezer paper stencils so if you have patience and a steady hand, go for that intricate design. Otherwise, simple shapes work best.

I sized my design to fit on a standard piece of 8.5"x11" paper and then cut out a piece of freezer paper to those dimensions.

You'll need to either print your design or trace/draw it on the freezer paper.  (TIP! If you are going to use a printer make sure to feed the freezer paper so that printing is on the paper side. Run a test with a piece of regular paper and mark a corner on it to make sure which way the freezer paper needs to be placed in the printer tray.)


Once you have your design on the freezer paper you'll need to cut out the parts of the stencil that expose the parts of the shirt you want painted. Take your time cutting out the stencil and use a cutting board or thick piece of cardboard for a cutting surface. You want clean lines.

Place the stencil on the shirt right where you want your design with the waxy side down and adhere it to the shirt with a warm iron (no steam!). Run the iron over the stencil until it is completely stuck to the shirt.


To prevent the fabric paint from seeping to the other side of your shirt, place a piece of cardboard inside it to act as a barrier. Now apply the fabric paint with a small sponge or stiff bristle brush. I prefer to do several light coats of paint so that I don't get any accidental drips. I also apply the paint with light up and down dabs. If you swipe your brush back and forth you might get some of the bristles underneath the stencil.

Once the paint has dried, peel off the freezer paper. Follow the paint manufacturer's instructions for heat setting the paint. The brand I used just needed a final ironing to set the paint.

Ta da! Instant stain removal!

Sunday, July 24, 2011

Occasional Seamstress

When it comes to sewing I'm either totally crazy, can't get enough, stay up until 2AM to finish a project or, well, ...eh...

I don't sew often but when I do, I finish several projects within a day or two. My projects tend to be small, house or accessory related stuff. No clothing or anything that has to be perfectly tailored. God help me when I have to hem a pair of pants (which happens often when one is 5'1").

Bruce couldn't care less about sewing

One of my quickie projects was a stool cozy. I have several pieces of brown, fake leather furniture that just seem to blend into one another. My solution, cover the cube footstool from Target with some groovy fabric.

The cover just sits over the stool so I can easily throw it in the washing machine when one of the cats decides to throw up on it. And it was so easy to make! I just measured the dimensions of the cube and added 1/2" on each side for a seam allowance. 

Here is my fancy pattern:


My next project was a grocery tote out of some random fabric I found in the remnant bin at Joann's. The lining fabric is an old sheet that my dog Lola tore a chunk out of last summer.

I even managed to put in a pocket for my keys, phone and wallet
But, the nicest thing I made was this cute, reversible bag. The pattern (which was so easy to follow!) and instructions can be found on VeryPurplePerson. The pattern fits perfectly on 4 fat quarters (for the non-sewers, fat quarters are 18"x24" pieces of fabric that are sold individually, typically for quilting projects).


I still have two throw pillows to cover so I hope my sewing mojo keeps rocking.


Lola says "Hi".

Thursday, June 2, 2011

Monday, May 30, 2011

IKEA Hack Cat Cabinets


You cat owners out there know that stylish, affordable cat furniture is hard to find. If you have dogs and cats there are very few contraptions that keep dogs out of the litter and kitty food. 

Beavis hacked some really cool IKEA cabinets to create a kitty litter containment locker and a private dining room for our two cats. 

Pepper couldn't wait for her new groovy kitty condos
You'll need:
  • IKEA PS lockers
  • Heavy Duty Tin Snips
  • Cat Door Kits
  • A drill and a drill bit intended for drilling through metal
After assembling the cabinets Beavis traced out the hole for the cat doors using the template that came with the cat door kit. The cabinets came with shelves but we didn't use them. You could hang them on the wall for instant magnet boards.

Beavis had to drill a few pilot holes around the traced line in order to get the tin snips into the cabinet to cut out the door.

Mark where your screw holes need to go and drill through. Attach the door and fasten. Done!

Pepper makes her first "deposit'

We left the flap off the kitty litter cabinet to allow the cats some room to move since the litter pan took up most of the cabinet space.

Monday, May 16, 2011

More Crochet Love

I've been on a crochet kick lately. A crazy, abstract crochet kick with spirals. I have no idea of what these pieces will turn into but it is a great way to use up the little bits and pieces of leftover yarn from other projects.


The piece above is crocheted with leftover sock yarn. I just make random spirals, stitch them together and occasionally add lines of single crochet around them. I think this might look great attached to a felted bag or even glued to a canvas and hung up on my blank walls.


This second piece is made out of Berroco Comfort leftovers from a baby blanket I made a few months ago. Well, let's just say this piece started off with leftovers but I have since purchased other colors to add in. I hope I continue to be in the mood to work on this so it gets big enough to be a huge, swirly blanket on my couch.

Thursday, May 12, 2011

My on and off again love affair with Crochet

My grandmother taught me how to crochet when I was about 6 years old. She had me do yards and yards of crochet chains and when my stitches were even enough I learned how to take that stitch and connect it to others to make shapes.

Over the years I learned more and more crochet techniques from Grandma. I would ask her what the stitches were called and she always told me that she made it up. For awhile I thought my grandma invented crochet.

Crochet has always been one of those things that I would do on occasion. I would buy enough yarn for what I intended to make and if I ran out I just added other colors or headed back to the store. I never read patterns or calculated my gauge.

Now, I am at a point where I want to be able to follow patterns so I am slowly teaching myself what different crochet stitches are and how to read a pattern.

My first attempt is this blanket.


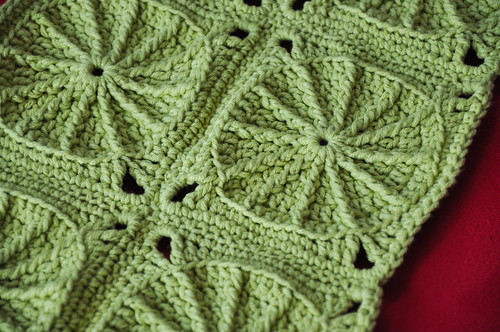
This is the Sunny Spread pattern and I love it!!!  You make these squares and then just sew them together. So far my plan is to make a 7x10 lap-sized blanket. 33 squares down, 36 to go.

Monday, May 9, 2011

Crafty, Crafty, Crafty

I've been super busy but also super crafty lately.

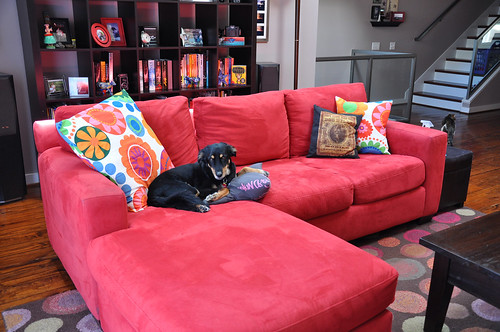
I've decided to add more bright colors to my home. A few weeks ago I looked around and noticed that everything seemed very brown and earthy with big chunks of red thrown in. To add some color I made new throw pillows for the couch.


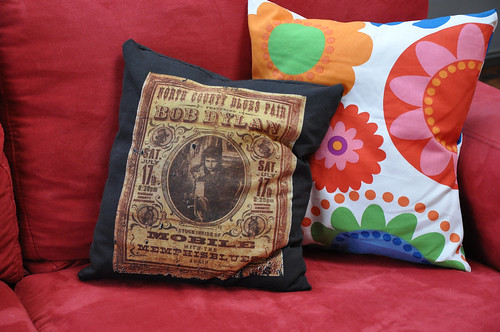
I scored some pre-cut, discounted fabric at IKEA and went a little crazy. Both flower print pillows are simple envelope-style pillow cases. Just easy, straight seams. I made the pillow inserts from an old sheet that Lola (pictured above) tore up and a giant bag of cotton stuffing that a friend gave me.


The other two pillows were made from t-shirts that I never wore. My closet is full of t-shirts that either 1) Don't fit, 2) Fit weird, 3) or just end up at the back of the armoire and never get used.

The t-shirt pillows are the same envelope style as the flower pillows. I didn't even bother to hem the edges in the back. I figured they would end up covered in dog hair and in the washing machine every week.


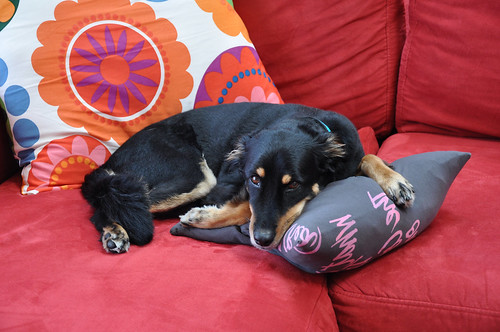
As you can see, pillow covers made out of t-shirts come in handy when one's dogs tend to cuddle up with them.

Lola loves the pillows.