Friday, February 4, 2011

Winter Knitting

Lola loves hand knitted stuff
 People have lost their minds here in Houston over the weather.  There was all this talk about "Snowpocalyspe!!!!" but all that really appeared this morning was a layer of thin ice over everything.

The city is covered in freeways so it was best for everyone to stay at home today and avoid the icy roads. On a side note one can't really get anywhere in Houston without having to use a freeway and some sort of bridge.

Anyway, this cold weather has given me a chance to use the items I've knitted up recently. The striped hand warmers came in handy yesterday while walking the dogs. Well, not so much the walking part but the part where I had to place a baggie over my hand and pick up after the doggies.

The two neckerchiefs, or as I like to call them, "Bandito Bandanas", are perfect to tie around my neck and ears to keep the wind off me. Of course, I make socks all of the time and actually wear them so having a new pair is really nothing new for me.

My favorite things I've knitted recently are the woolly mittens. I know folks who live in cooler climates are probably laughing their butts off right now about someone in Houston being excited over mittens. Hey, just wait until your part of the world experiences a "heat wave" with 80ºF temperatures.  I spend months in 95ºF + weather accompanied by 95% + humidity and actually spend some of that time outside with two hairy dogs. Anything below 75ºF for me is considered cool weather.

For all you knitters and crocheters out there, details on the projects are on the Rav.

Friday, January 28, 2011

Awesome Workshop with Jenine Bressner


I was so fortunate to attend a Ruffled Accessories workshop last weekend with the artist, Jenine Bressner. Jenine is a fantastic glass, fiber and all other kinds of media artist. She's also a really cool, crafty chick. If you are in the Houston area, check out her exhibit at the Houston Center for Contemporary Craft. It is gorgeous!

The workshop was great! We learned how to make all these different forms with this cool, stretchy mesh fabric that I am currently on the hunt for.  

The pink and orange "poof" above is destined to become a hair accessory for me. I think we all need a little "poof" in our lives. The blue and green poof is looking like it needs to be attached to a hair elastic. I made another large poof with different shades of green that seems like it might work better as some sort of brooch or necklace adornment.


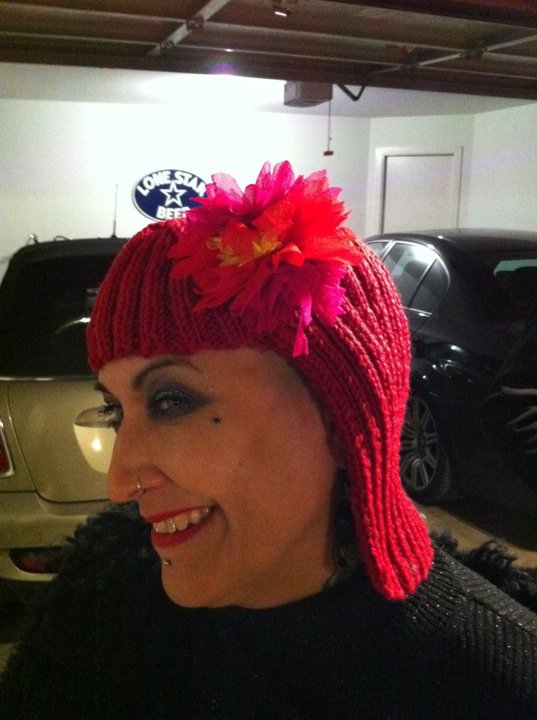
One of the other forms I made was turned into a hair poof that ended up on a hat/wig that I knitted for a neighbor.

Only Mickey, my fabulous neighbor, could rock this hat like a rockstar!

Tuesday, January 18, 2011

Kustom Koozies

The Beer Koozie serving its purpose
A dear friend celebrated his 70th birthday last month.

And, yes, I have friends of all ages.

My friend's family wanted to do something fun, crazy and different and decided to have a Pedal Party. Since the family was footing the bill for the Pedal Party I wanted to contribute some kind of party favor. I decided to have custom beer can koozies printed up.

Well, I did some research and found several companies that would print up koozies for varying fees. I only wanted 16-20 so that narrowed down the selection of places that would accommodate small orders. I found a company that had decent prices and a design wizard on their site with a selection of clip art. Not terribly great but at least I could have whatever text I wanted.

Well, I waited just a tad too long to place the order and found out that a rush job with rush shipping (3 weeks is considered "rush") was going to cost me $75 for 16 koozies. Um.....no!

I looked online and found that one can order blank koozies. I'm crafty, right? I can make my own darned koozies and they will be fabulous!

The koozie pictured above is what I came up with. The blanks were way cheaper than the printed versions and I was able to order a pack of 20 that were pre-sewn. Looking back I wish I would have ordered the unsewn version. They were cheaper plus I could have used my sewing machine to attach all of the patches and then sew up the sides.

Anywhoo.... I created a custom image using Photoshop. If you try this at home make sure you measure your koozie and plan out how large you want the patch to be. I was able to fit 9 of the images on a 8.5" x 11" piece of paper. I printed out the design on t-shirt transfer paper which you can pick up at your local craft store or office supply store.

The images were cut out and ironed onto patches made from an old flat sheet that my dog, Lola, decided to didn't need to be in one piece anymore.

I then hand stitched each patch onto a koozie using a thick needle and embroidery floss. The first 5 koozies weren't so bad but pushing and pulling a needle through that thick koozie material took a toll on my fingers.  This was the point where I realized the unsewn koozies would have been the better choice. I ended up using a pair of pliers to finish the hand sewing.

Some of the iron-ons had a few tears where the transfer wasn't heated up enough to be separated from the backing paper. To hide those flaws and add some bling I used my Hot-fix tool and applied some crystals. One of Mo's craft rules - Sparkles make it better.

The Beavis enjoying his koozie
The koozies were a hit and turned out to be pretty tough. The Beavis accidentally dropped his koozie on the street while the Pedal Party was in transit. He was able to recover and use it even after it was run over by several cars.

Oh, and if you are wondering, "...what the heck is a Pedal Party"? It is this awesome mobile bar that you pedal down the street like a bike. The "bike" can hold 16 people plus the driver and is pedaled by 10 people. Check out the link above.


That's me on the back bench. The minimum height for those that pedal this contraption is 5'4". I was no where near able to reach the pedals so I got to hang out on the back bench and enjoy the ride and my beer.

Saturday, January 15, 2011

Mo's Momma's Chicken Thing

I'm not a cook. I actually prefer to not cook but I do have a few dishes that I can make that don't gross people out.

Some people have referred to this tortilla casserole thing that I make as King Ranch Chicken but as far as I am concerned, this is my mom's chicken thing.

I can tell you how to make it but this isn't a real recipe. It is a "throw-a-bunch-of-stuff-together-and-cover-it-with-cheese" kind of thing.

Here is what you need (roughly):
1 casserole dish
1 package of boneless chicken thighs or breasts
2 cans of Cream of Celery soup
Tons of shredded cheese
At least one package of thin, corn tortillas
2 cans of Rotel
1 can of Black Beans

Cook your chicken (fry it, grill it, bake it, BBQ it, whatever...) and chop it/tear it into small, bite sized pieces. Set aside in a bowl. Throw the condensed soup along with 2 cans of water into a pot and turn on the heat. You can just heat the tortillas in a microwave but I prefer to toast them over the gas flame on my stove. I swear this dish tastes better when you burn the tortillas over an open flame just a little bit. After you toast a tortilla, dip it into the soup to soak it and then place it in the corner of the casserole dish. Continue toasting and dipping tortillas until you have lined the bottom of the dish. Then spread out a layer of chicken, the Rotel and black beans. Season to taste. I use Nature's Seasoning. Then spread out a layer of shredded cheese. I usually pour a little of the soup over this layer and then place another layer of toasted and souped tortillas over that. If you have a shallow pan one layer should do the trick but you can continue creating layers until you run out of ingredients. For the final layer I pour on more cheese.

Since everything is cooked you can eat this right away but I prefer to let this bake in the oven at 250 degrees for about an hour.

I recommend that you let this dish cool slowly and then pop into the fridge to be re-heated and eaten the next day.  It tastes so much better after it has been refrigerated. Plus, I like having dinner waiting for me and The Beavis.

This is my "I need to bring a dish to a party" dish and it seems to be well liked. If I don't bring this over on Thanksgiving my father-in-law freaks out.

Thursday, December 30, 2010

Fridge Magnet Art

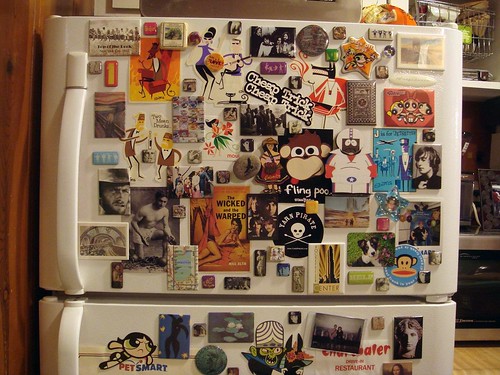
I have a thing for magnets and ephemera. I love random post cards, stickers I can't bear to stick to anything and cutouts from magazine ads. For awhile I used my refrigerator as my collage canvas. It was OK but a little messy.


When I moved about a year ago I acquired a new stainless steel fridge. Most of my magnets did not stick. Crap! The Beavis seemed somewhat pleased that I could no longer have my crazy, random fridge "art" on display any more. He's a bit of a neatnik. 

So, I came up with this:
Pardon my craptastic photography. The lighting in my kitchen is dark and weird and I'm too lazy to set up the proper lighting.
This piece hangs over my kitchen peninsula and I can change out the artwork whenever I want plus The Beavis likes that my collage is contained and not in the way of him wiping down the refrigerator doors. 

I bought a canvas from the art store and a quart of magnetic paint from the home improvement store. Seriously. That is all you need. Ok, maybe a brush or paint roller and a frame if you want. 

If you don't plan on framing your magnetic art canvas, spend a few extra bucks and get a canvas with a "gallery wrap". This means that the canvas is wrapped around the sides and stapled in the back. You can save some $ by getting a canvas with the staples on the side but no amount of paint can hide those staples. You could also use a canvas board or even just a piece of wood for this project.

I decided to leave the canvas the color of the paint but if you want to get all matchy, matchy you can apply some latex paint over the magnetic paint.

A word to the wise... magnetic paint stinks!!! Do your painting outside and wear breathing gear. Also, it takes many coats of the magnetic paint to lay down the metal particles that your magnets will be attracted to. I ended up putting 10 thin coats on my canvas. After several coats use your heaviest magnet to test the "stickiness". 

One more tip, use a heavy duty hanger when you put your magnet art on the wall. The paint plus your cute little magnets can be rather heavy. I found these awesome hooks at Lowe's that don't damage sheetrock and hold up to 50 lbs.

Wednesday, December 22, 2010

Button Wreath Tutorial

Look ma! I'm on TV!

Check out Shawn, me and Sarah from Sew Crafty on Great Day Houston with some Christmas craft tutorials. You might recognize the button-adorned frames. 

http://www.khou.com/great-day/gdh_122010_seg3-112183544.html

Wednesday, December 1, 2010

Family Intro - Part 1

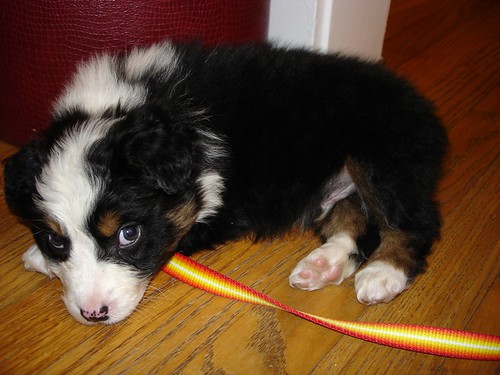
Meet Bruce.  He is my 4 yr. old Australian Shepherd that I've had since he was 7 weeks old.


This 70 lb. baby isn't always the best behaved or the most calm dog but I love him dearly.


He is extremely smart. Bruce sits, shakes hands, does a mean high-five, models my knitted projects and will fetch a tennis ball from under a chair or from the middle of a lake.